During the last blog post, I wrote about how I committed to sewing more with my fabric stash. I’m keeping my promise. What do you make when you are a sewing novice? My answer would have to be throw pillows. It’s a practical sewing project that you can use to decorate a particular area in your home. If you are a beginner, the it teaches you skills such as sewing in straight lines and pivoting corners. As a sewing novice, it’s instant gratification for me because it doesn’t take me a whole day to complete throw pillows.
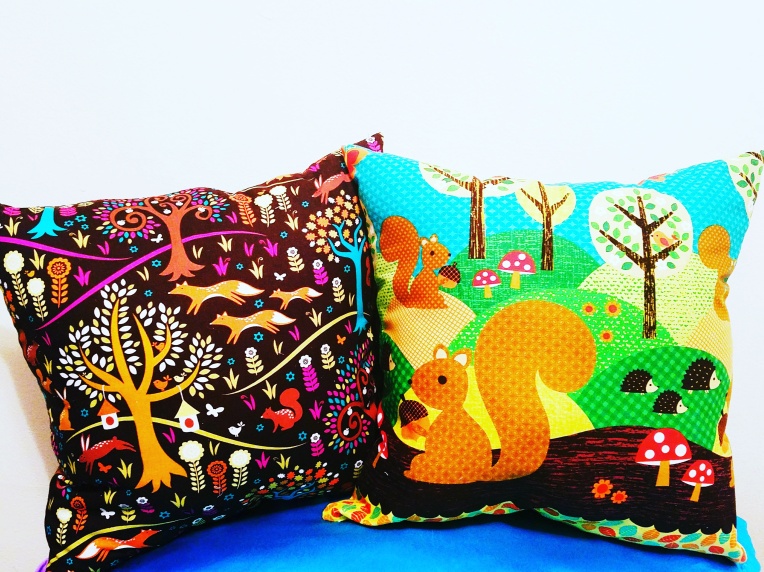
I have plenty of novelty fabric stored in a bin. I also had a large bag of polyfill. I hate to admit it, but the bag of polyfill had been in my room for at least 9 months. I told myself, it was time to sit down and start working on a project. My throw pillow sewing project included fabric from Michael Miller’s Norwegian Woods line. The fabric was perfect for the look I was trying to accomplish. I have an obsession with woodland animals. It reminded me of fall, yet bright enough to uplift someone’s mood. I think it’s a great fabric line for nursery items and quilts as well.
 Returning to the basics wasn’t a bad idea. I haven’t sewed any throw pillows in over 10 months. I remember hating my very first throw pillows because they weren’t firm enough. I did some research and started looking for popular sizes of throw pillows. I came by one tutorial, Sew Comfortable: How to Sew Perfectly Plump Throw Pillow Covers by Beth Galvin from Craftsy. The tutorial was very helpful for me because I needed the correct seam allowance for sewing throw pillows. Although I lacked having a pillow form, I decided to continue following the pattern by cutting 17 x 17 inch fabric squares for my pillow. I only had enough polyfill for two pillows at the time, so I decided to keep the purple shaded fabric for a later project.
I sewed around the fabric squares right sides together with a 1/2 inch seam allowance and left an opening at the bottom of the pillow for turning and stuffing. After sewing, I pressed my seams and trimmed the corners so that they wouldn’t be so bulky at the ends.
 I also used a wooden stick to help place an even amount of polyfill on both sides of the pillow. Once I was happy with the firmness of the pillow, I pressed the opening at the bottom edge of the pillow tucking the raw edges inside. Finally, I machine stitched the bottom opening close.

Now, I had two bright woodland animal throw pillows that would be great in my bedroom or my next apartment space. I’m one for going against fashion rules. Yes, I’m 30 years old and I still like adorable baby print fabric. I don’t think I’ll ever stop being a kid at heart. If you have any kids or have a baby on the way, then I would highly recommend it for a new nursery or baby gift making project.
Happy pillow making!
-Stephanie